If you’re using Azure Managed Identities and want to assign Microsoft Graph API permissions — here’s how to do it securely using PowerShell. No secrets. No manual portal work. Just automation and the principle of least privilege.
🧩 Step 1: Connect to Microsoft Graph
Connect-MgGraph -DeviceCode -Scopes "AppRoleAssignment.ReadWrite.All", "Application.Read.All"
What it does:
Authenticates your session to Microsoft Graph with the right scopes to read and assign app roles.
💡 You’ll be prompted with a device code login.
🧩 Step 2: Find the Managed Identity’s Service Principal
Get-MgServicePrincipal -Filter "startswith(DisplayName, 'func')"
What it does:
Fetches the service principal for your Azure Function (or other resource) by partial name. I normally use a naming convention for Azure resources, it makes the service principal easy to find.
✅ Pro tip: Use the Object ID (not the App ID).
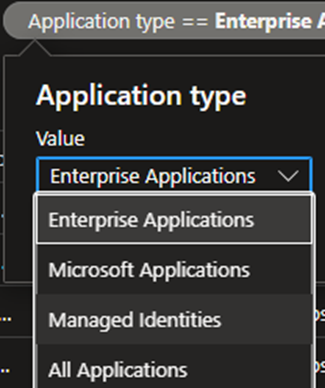
👉 Alternative method: You can also find the service principal in the Azure Portal:
- Go to Azure Active Directory > Enterprise Applications
- Click + New application and select Managed Identities from the drop-down under Application type.
- Find and select your resource (like a Function App or VM) to view its service principal.
🧩 Step 3: Store the Managed Identity in a Variable
$msi = Get-MgServicePrincipal -ServicePrincipalId "<service_principal_id>"
What it does:
Retrieves and stores the full service principal object for your managed identity.
🧩 Step 4: Define the Permissions You Want to Assign
$myPermissions = @(
    "DeviceManagementConfiguration.Read.All"
    "Mail.Send"
)
What it does:
Creates an array of permission values you want to assign from Microsoft Graph.
🧩 Step 5: Get the Microsoft Graph API’s Service Principal
$graph = Get-MgServicePrincipal -Filter "AppId eq '00000003-0000-0000-c000-000000000000'"
What it does:
Gets the Microsoft Graph service principal object, which holds all available roles (permissions).
🧩 Step 6: Loop Over Your Desired Permissions and Assign Them
foreach ($myPerm in $myPermissions) {

    # find the permission in the graph service principal
    $permission = $graph.AppRoles |
        Where-Object Value -Like $myPerm |
        Select-Object -First 1

    # if permission found, apply it to the MSI
    if ($permission) {
        $appRoleAssignmentParams = @{
            ServicePrincipalId = $msi.Id
            AppRoleId          = $permission.Id
            PrincipalId        = $msi.Id
            ResourceId         = $graph.Id
        }

        New-MgServicePrincipalAppRoleAssignment @appRoleAssignmentParams -Confirm
    }
}
What it does:
- Loops through each desired permission.
- Looks up the permission in Microsoft Graph’s app roles.
- Builds the assignment with:
PrincipalId: who gets the role (your MSI)AppRoleId: what permission to assignResourceId: the app offering the permission (Graph)
- Assigns the app role using
New-MgServicePrincipalAppRoleAssignment.
🚨 Gotcha Alert: Always include ServicePrincipalId. Omitting it may trigger unexpected prompts or errors.
✅ Done!
Now your managed identity has just the permissions it needs — no secrets, no overprovisioning. 😎